Greetings!
I took me more than a week to update my blog, so I reward you with not one but two pictures. Last time i said I would like to do something within the steampunk genre, so I did. The first one I did on Christmas eve to scare all the childeren. It is an evil titan sized Steam rolling santa that collects naughty children in cages beneath him and uses them as fuel (the burner is in his mouth). I tried to make the picture so he is about to stomp the viewer and grab him. I had to redraw the stomping foot a few times.
The second one is actually somehting that I may develop further, putting it in a battle scene with soldiers at it's feet. I will try some different colour schemes first on it. It is an Imperial battle walker. It's main armament is a self-loading steam operated cannon (it uses partly steam from the pistons and some directly from the boiler. If the enemy gets too near it uses the large circle saw on it's left side.
The walker takes 3 crewmen. 1 commander, 1 driver (aka "Walker") and 1 engine operator. The commander stands with the hatch open and can use the telescope and calculator combination to designate targets and fire solutions. The telescope can lock to the cannon's movement so that when the telescope is moved the cannon moves accordingly (10 degrees to left and 30 degrees right). The driver operates the feet and steers the walker. It requires a great deal of skill to operate the walker and with extremely limited vision the driver must rely on the commander to get directions. The engine operator functions as a back-up driver/commander and monitors the steam engine. He also fires and operates the weapons from inside the vehicle.
Enjoy and until next time happy new year 2012!
Thursday, December 29, 2011
Tuesday, December 13, 2011
Steampunk and Francisco de Orellana Amazon expedition
Hi,
This is a fast update what my next projects may be. I have a long time wanted to do something for the genre Steampunk. I really like the artist Keith Thompson take on it. Steampunk art combines Victorian age aesthetics with industrial and fantastic mechanical technology. There are people of the steampunk subculture that creates the most cool looking (useless) devices ever. The best part is that the devices are made from all kind of old junk these artists find.
Below is a link for more pictures:
Google picture search "Steampunk"
Yesterday I read about Francisco de Orellana's expedition down the Amazon river. The short story is that in 1541 the Spaniards led by Gonzalo Pizarro and his second in command Francisco de Orellana went out to search for the legendary "Land of Cinnamon" and cities of gold . They started from what is today Peru and through the Andes eastward. Depending on sources they had 220-350 Spaniards, 150 horses and 4000 natives, and a large pig herd for food, when they started. After almost a year navigating through the Andes they arrived to one of Amazon's side rivers Napo. Most of the animals and Indians had either died or deserted during this time. Now their main objective was to stay alive. So Pizarro ordered Oreallana to go downstream for search of food with 56 men. Oreallana and his men never returned to Pizzaro but continued on the Amazon all the way to the mouth of the Amazon. During their voyage they clashed with local Indians many times, on one occasion they even fought a tribe led by women warriors. The Spaniards also committed atrocities like burning and slaying whole villages on the way. Pizarro returned to Quinto with 86 men and lost his position with the king. Oreallano enamoured the Spanish court with his tales and led a new expedition to the Amazon to fortify Spanish claim of the lands. The second expedition also ended in disaster with Orellano's death 1546. Later on Spain lost New Andalusia to the Portuguese what became Brazil.
I was quite inspired by this tale of big hopes and the following complete and utter disaster. I am thinking about a picture of an encounter on the river with the ragtag Spaniards in their boat and hundreds of Indians on small rafts throwing spears, stones and whatever at the already defeated explorers that discovers that their gunpowder is wet. My objective is not to romanticize or glorify what happened, but try to do a snapshot of an intensive situation and what may have happened, a bit like the beach landing in Saving Private Ryan.
I will probaly update again later this week with sketches as for now I must concentrate on my exams. Until later.
Monday, December 12, 2011
Ali-King of the Jungle
Hi again,
I should be reading on my exams, but instead I went on and drew Ali Ibn Zuleiman. Ali lives during the legendary times of Arabian nights. He is from some far away unspecified jungle beyond the great desert and calls himself "King of the jungle". A long time ago his family got mixed with thunder djinnis and so a part of the family line can command thunder and lightning at their will. In some version of the Legend Ali had a faithful black panther named Shaka that in time of need appeared beside Ali. Other versions describes that Ali could turn into a panther with parts of his body made of pure lightning. When this hero fights evil he wields a golden shield and a blade made of pure lightning. It is said that the blade is made of the wildest lightnings the thunder djinnis captured and forged by their best smiths. The blade was given to Ali's ancestors so they could protect the djungle from outside threats.
I should be reading on my exams, but instead I went on and drew Ali Ibn Zuleiman. Ali lives during the legendary times of Arabian nights. He is from some far away unspecified jungle beyond the great desert and calls himself "King of the jungle". A long time ago his family got mixed with thunder djinnis and so a part of the family line can command thunder and lightning at their will. In some version of the Legend Ali had a faithful black panther named Shaka that in time of need appeared beside Ali. Other versions describes that Ali could turn into a panther with parts of his body made of pure lightning. When this hero fights evil he wields a golden shield and a blade made of pure lightning. It is said that the blade is made of the wildest lightnings the thunder djinnis captured and forged by their best smiths. The blade was given to Ali's ancestors so they could protect the djungle from outside threats.
Sunday, December 11, 2011
Finger Painted Greeting Cards
Hi,
It has been over a year since I last posted something. I have focused my creative energy on photographing. But now I made some finger drawings om my IPad (using Autodesk's Sketchbook Pro). Please download and use for your Christmas greetings if you like it. Please leave a comment if you download.
Picture resolution is 640x480 pixels and should be fine for 15x10 cm prints.


Tuesday, August 17, 2010
Stuff in my home to draw
Greetings readers!
I have a short vacation. I am home doing stuff that I have not have time doing earlier and one thing is drawing :) I have several ideas for projects but yesterday I tried my hands on drawing something that I have at home.
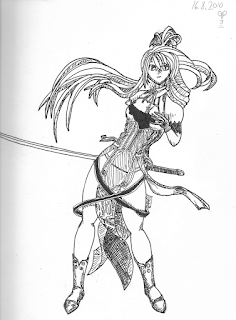
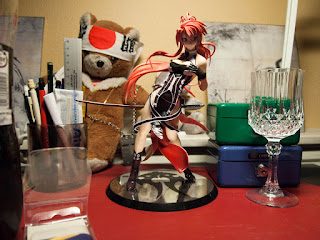
Maybe the most interesting piece is a statuette about 25 cm high that I brought back from my trip to Japan back in 2007. I have already forgot the name of the character it portrays but it doesn't matter. I had the lady in front of me and tried to project the angle of view to 2d paper as accurately I could. I noticed I had to focus on not trying to change my viewpoint and look at details that where hidden from my original angle, like the hand holding the sword. From one book I read that one should try to observe and draw the empty spaces in your model. When you see something from an angle your brain extrapolates the view to a 3d model in your head and kind of guesses what the thing looks like form different angels. This is all good in real life but when you try to be like a camera and just capture the projection of a view this extrapolating distracts you and screws around with proportions. For example imagine a person holding his hand and arm outstretched in front of him and you see the person from the front. What you actually see is that the arm would take up a small angle of your view and fit into a small circle. Your brain on the other hand conjures a model of the arm and tells you that is about 1 meter long. This creates a disjunction between what you actually see and what you think that you see. So what I train to do is kind of overriding the wiring in my brain to see the picture as it is.
As for the picutre I first made a pencil sketch that I inked afterwards. I think this is the first picture that I inked and I had som problems with shadows and different shades. With a pencil you can control how hard you press and you can smudge the line. With an ink pen it's a different story, for shades you have to use line patterns with different spatial frequencies to simulate shadow. I am not very good at it at the moment. But thats why I train :)


Thursday, August 12, 2010
Ransik - My First Hero
Hi,
Since last time I have a hard time finding motivation and time to draw. But yesterday after work I found inspiration and the nesseccary time. This piece took me about 3-4 hours (including the prework).
So this gentleman is Ransik Thaemon (The nerds in the herd might now him :) It took about 1 hour of drawing stick figures and even photoing myself in this stance with a stick in my hand before I could start on the final version. The photo is quite horrible, but it dosen't matter if you only want to get the perspective stuff and proportions. Ransik is my first attempt for a completed figure. I added the background in a hurry to tell that Ransik dosen't live on a blank paper.
I added a little colour to Ransik's fist in photoshop just to make it a bit more interesting.

Sunday, August 1, 2010
Digital colour
Hi again!
It's been almost a week since my last update. Sorry folks! Summer and work takes lots of time from my drawing time (not to mention Starcraft II ahem...)
Well today I purchased a very important tool, a pen ereaser! Why you ask? While sketching you will almost use an ereaser as much as your pencil. It is so much easier to erease in small areas with a pen ereaser than with the traditional block ereaser. You will also use your ereaser to make highlights. Now you can understand why it is such an important tool.
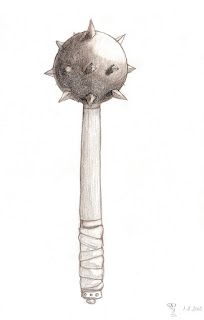
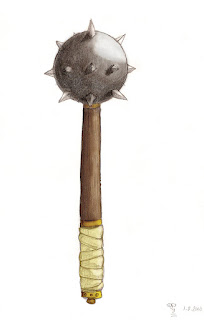
Erase that from your memory, because today I actually tried out to colour my black and white pencil drawings on the computer. So the process is simple as this:
1. Draw a picture: Try to leave you final picture as clean as possible. This will save you some time on the computer statge
2. Scan your picture: For this picture I used 300 dpi wich is a good compromise in regards to space/quality. I scanned the picture using Adobe Photoshop elements wich I use to edit my photos, but it is nearly as good at editing pictures. I used the PNG file format that is a lossless format wich is good in the editing stage.
3. Open your scanned file in some graphics software like photoshop, Gimp etc. The software should be able to support layers.
4 Cleaning the picture: Depending on your scanner software you can also do this phase in step 2. To get rid of most of the stains and light lines on you pictures you want to make the contrast between lighter areas and dark areas as high as possible. There are tons of ways to do this and I wont go into technicalities but I myself used a Levels-layer. Strenghtening the middletones gave me a final picure with crisp dark countours. I also used the ereaser-tool for final touches.
5. When I had a nice crisp black and white pictures I used layers to paint over the picture. For this picture I used a colour layer with Linear Burn blending mode and an opacity of 75%.
6. For finishing touches I used the dodge tool to lighten highlights in the picture.
7. Save your picture, for a final version you can flatten the layers and save it as a jpeg. I like how the coloured version retains the hand drawn quality.


Subscribe to:
Comments (Atom)


