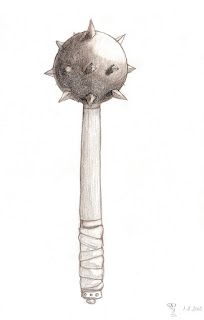
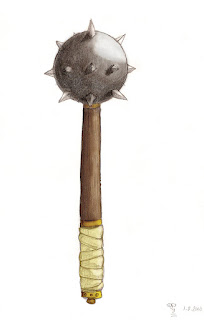
It's been almost a week since my last update. Sorry folks! Summer and work takes lots of time from my drawing time (not to mention Starcraft II ahem...)
Well today I purchased a very important tool, a pen ereaser! Why you ask? While sketching you will almost use an ereaser as much as your pencil. It is so much easier to erease in small areas with a pen ereaser than with the traditional block ereaser. You will also use your ereaser to make highlights. Now you can understand why it is such an important tool.
Erase that from your memory, because today I actually tried out to colour my black and white pencil drawings on the computer. So the process is simple as this:
1. Draw a picture: Try to leave you final picture as clean as possible. This will save you some time on the computer statge
2. Scan your picture: For this picture I used 300 dpi wich is a good compromise in regards to space/quality. I scanned the picture using Adobe Photoshop elements wich I use to edit my photos, but it is nearly as good at editing pictures. I used the PNG file format that is a lossless format wich is good in the editing stage.
3. Open your scanned file in some graphics software like photoshop, Gimp etc. The software should be able to support layers.
4 Cleaning the picture: Depending on your scanner software you can also do this phase in step 2. To get rid of most of the stains and light lines on you pictures you want to make the contrast between lighter areas and dark areas as high as possible. There are tons of ways to do this and I wont go into technicalities but I myself used a Levels-layer. Strenghtening the middletones gave me a final picure with crisp dark countours. I also used the ereaser-tool for final touches.
5. When I had a nice crisp black and white pictures I used layers to paint over the picture. For this picture I used a colour layer with Linear Burn blending mode and an opacity of 75%.
6. For finishing touches I used the dodge tool to lighten highlights in the picture.
7. Save your picture, for a final version you can flatten the layers and save it as a jpeg. I like how the coloured version retains the hand drawn quality.


No comments:
Post a Comment