Greetings readers!
I have a short vacation. I am home doing stuff that I have not have time doing earlier and one thing is drawing :) I have several ideas for projects but yesterday I tried my hands on drawing something that I have at home.
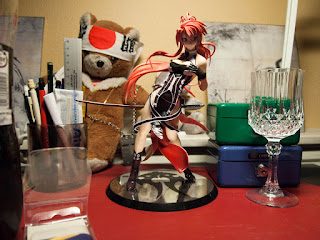
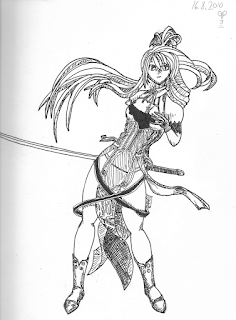
Maybe the most interesting piece is a statuette about 25 cm high that I brought back from my trip to Japan back in 2007. I have already forgot the name of the character it portrays but it doesn't matter. I had the lady in front of me and tried to project the angle of view to 2d paper as accurately I could. I noticed I had to focus on not trying to change my viewpoint and look at details that where hidden from my original angle, like the hand holding the sword. From one book I read that one should try to observe and draw the empty spaces in your model. When you see something from an angle your brain extrapolates the view to a 3d model in your head and kind of guesses what the thing looks like form different angels. This is all good in real life but when you try to be like a camera and just capture the projection of a view this extrapolating distracts you and screws around with proportions. For example imagine a person holding his hand and arm outstretched in front of him and you see the person from the front. What you actually see is that the arm would take up a small angle of your view and fit into a small circle. Your brain on the other hand conjures a model of the arm and tells you that is about 1 meter long. This creates a disjunction between what you actually see and what you think that you see. So what I train to do is kind of overriding the wiring in my brain to see the picture as it is.
As for the picutre I first made a pencil sketch that I inked afterwards. I think this is the first picture that I inked and I had som problems with shadows and different shades. With a pencil you can control how hard you press and you can smudge the line. With an ink pen it's a different story, for shades you have to use line patterns with different spatial frequencies to simulate shadow. I am not very good at it at the moment. But thats why I train :)
Tuesday, August 17, 2010
Thursday, August 12, 2010
Ransik - My First Hero
Hi,
Since last time I have a hard time finding motivation and time to draw. But yesterday after work I found inspiration and the nesseccary time. This piece took me about 3-4 hours (including the prework).
So this gentleman is Ransik Thaemon (The nerds in the herd might now him :) It took about 1 hour of drawing stick figures and even photoing myself in this stance with a stick in my hand before I could start on the final version. The photo is quite horrible, but it dosen't matter if you only want to get the perspective stuff and proportions. Ransik is my first attempt for a completed figure. I added the background in a hurry to tell that Ransik dosen't live on a blank paper.
I added a little colour to Ransik's fist in photoshop just to make it a bit more interesting.
Sunday, August 1, 2010
Digital colour
Hi again!
It's been almost a week since my last update. Sorry folks! Summer and work takes lots of time from my drawing time (not to mention Starcraft II ahem...)
Well today I purchased a very important tool, a pen ereaser! Why you ask? While sketching you will almost use an ereaser as much as your pencil. It is so much easier to erease in small areas with a pen ereaser than with the traditional block ereaser. You will also use your ereaser to make highlights. Now you can understand why it is such an important tool.
Erase that from your memory, because today I actually tried out to colour my black and white pencil drawings on the computer. So the process is simple as this:
1. Draw a picture: Try to leave you final picture as clean as possible. This will save you some time on the computer statge
2. Scan your picture: For this picture I used 300 dpi wich is a good compromise in regards to space/quality. I scanned the picture using Adobe Photoshop elements wich I use to edit my photos, but it is nearly as good at editing pictures. I used the PNG file format that is a lossless format wich is good in the editing stage.
3. Open your scanned file in some graphics software like photoshop, Gimp etc. The software should be able to support layers.
4 Cleaning the picture: Depending on your scanner software you can also do this phase in step 2. To get rid of most of the stains and light lines on you pictures you want to make the contrast between lighter areas and dark areas as high as possible. There are tons of ways to do this and I wont go into technicalities but I myself used a Levels-layer. Strenghtening the middletones gave me a final picure with crisp dark countours. I also used the ereaser-tool for final touches.
5. When I had a nice crisp black and white pictures I used layers to paint over the picture. For this picture I used a colour layer with Linear Burn blending mode and an opacity of 75%.
6. For finishing touches I used the dodge tool to lighten highlights in the picture.
7. Save your picture, for a final version you can flatten the layers and save it as a jpeg. I like how the coloured version retains the hand drawn quality.
Monday, July 26, 2010
Da Human body (The difficulty of drawing breast)
Hi again,
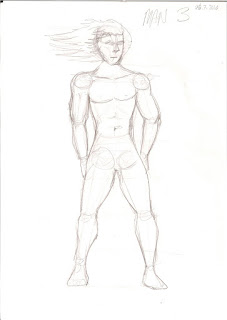
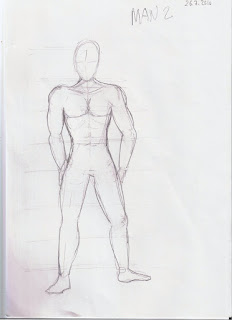
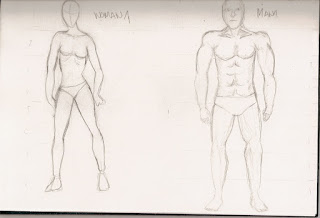
As it was a working day today I only had a few hours of drawing time after work. Today I tried my hands at something that I always before tried to avoid...Drawing the human body. I don't know if it is the face, the hands,the feet or something else that I manage to screw up and the supposed human ends up looking like a retarded gorilla or rat.
So the basics is to get the proportions right. The head is the key. Depending on the sources the length of an average human is 6-8 times the head. Supose that the length is 7 times the head, then the breakdown is:
-upper torso = 2 heads
-lower body/Hip = 1 head
-legs = 3 heads
-ankle and feet = 1 head
-Arms = 3,5 heads(the hand should end at the top of the thigh)
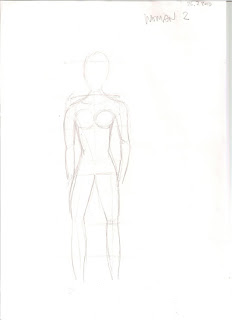
After looking at some videos where very serious dudes explains how to draw female bodies and breast I tried it myself. One pro tip to drawing women was to draw for the upper torso a bigger downward triangle and for the lower part a smaller triangle pointing up. My first problem was to draw women slim enough. My first drafts looked like men with boobs. After trimming away about 50% of arm width and shoulder size I got down to something resembling a woman.
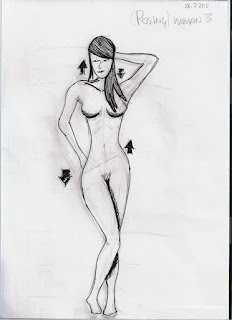
I also played with hip and shoulder positions. The hip and shoulder on the same side usually moves in opposite directions e.g. left hip goes down then the left shoulder goes up. I marked the movement with some arrows in one of the pictures.
Here are my results for today. Better than I expected (regarding my trauma drawing humans) but there is much to work on, hands, feet, faces, arm length when not pointing directly downwards etc.
Sunday, July 25, 2010
First Days (aka Damn cylinders are hard to draw!!)
So my goal is to learn draw some cool looking fantasy art with barbarians, knights, hot ladies in metal underwear etc. I searched the net for some good sites and found this:
http://www.stormthecastle.com/fantasyartschool/index.htm
The Fantasy Art school. I think it's kinda nice it starts from the basics, so I have been following the lessons in my practice. I am also checking out more detailed guides as I go (like perspective drawing etc.)
I have now for a day or so practiced the basics, like how to use the pencil, draw stright lines and some perspective drawing too. I could not guess that cylinders and ellipses are so hard to draw in perspective!
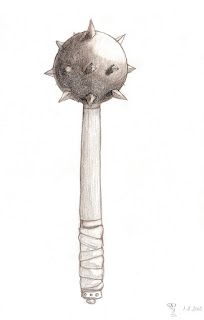
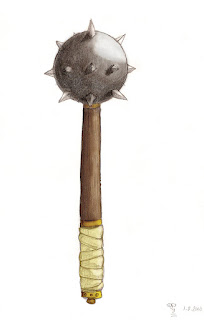
After some dissapointing hours with cylinders I tried out to draw some cool stuff like maces, shields and helmets. I am kinda pleased with what I accomplished. I added some pictures from my sketch book for you to see.
I had never heard of a tortillion before but after making one (a guide) and trying it out with the mace I was astonished how a simple tool like that made all the difference when shading stuff. Must say I have had a pleasent weekend learning to draw, even if most of the time it has been cylinders and straight lines :)
My Tools:
- two 2 B pencils
- Couple of HB pencils
- A sketch book
- A4 copy paper
- A self-made tortillion (the thingy you smear with)
- A set of inking pens
First steps on a long road
Hello!
This is my first post so I will go on and explain a bit why i decided to keep a blog. So the name of the Blog is Art from Zero to Hero, why so? Well this blog will be all about me learnig how to draw stuff! In my mind I start from almost zero, in the ten or so last years I have made some odd doodles but nothing really that I have put my mind into. In high school I took some Art courses but after that my skills have been in a steady decline.
Why now? Well for the ten or so last years I have been punishing myself for not continuing my drawing hobby. A short while back I was in London and while walking in art museums the flame must have been ignited inside me. In bookstores I looked at Fantasy Art drawing guides and I felt the urge to prove myself I could also draw like that.
So here I am at the start of my journey, I welcome you to follow my way from Art Zero to Hero!
Subscribe to:
Posts (Atom)